In collaboration with the Grace Hopper Celebration, Square had hosted a two-week long CTF that (as of time of writing) has just ended yesterday. This wide window in which to work with meant we were able to take a much slower pace to working on it than usual while still solving several of the challenges. I definitely had a good time working on some of these.
The following are writeups for some of the challenges we solved.
6yte
Our operatives found this site, which appears to control some of the androids’ infrastructure! There are only two problems. The robots love x86 assembly; the only thing easier for them to work with is binary. And they love terse command codes. Even 7 bytes was too many for this one.
This was a nice kind of shellcoding challenge. You hand in to the server just 6 bytes worth of encoded hex that gets read into a buffer and executed as x86. Mind you that six bytes normally isn’t very much, but there’s a nice takeaway right before the jump into shellcode.

So a whole lot of the work is already setup to point into a particular direction.
Where eax is set to 4, executing an int 0x80 will
result in a sys_write. Where ebx is set to 1,
it then holds the file descriptor to standard output. What’s left is to set
ecx to the flag’s pointer in edi, and change the size in edx to be
something much greater than 5.
My tool of choice in this was Python and Pwntools, which uses G(NU)AS to very handily script the transition from assembler to bytes.
Starting off with getting the flag pointer out of edi and into ecx, I simply
swapped them with xchg ecx, edi;, followed by the syscall. That worked out,
but only printed a few bytes of a much larger flag. I spent a little time
thinking of what safe value I could load in there that wasn’t so large I’d
cause a segfault, but could still fit in the two remaining bytes I had.
The cs register just so happened to have a consistently usable value for me
in local debugging, so I just moved it into edx by doing push cs; pop edx.

Because I had at first mistook how the data was to be sent into the server, I had written up a Python script already to submit it, that just went like so.
import urllib
from subprocess import Popen, PIPE

#Should call write(stdout, env[flag], 0x23)
''' asm('xchg ecx, edi; push cs; pop edx; int 0x80;').encode('hex') '''
data = '87f90e5acd80' #Six bytes read through scanf("%2x")

curl_arg = urllib.encode({'argument':data})

curl_str = ["curl", 'https://your-own-team-link.capturethesquare.com/6yte_test', '--data', curl_arg, '-k']

p = Popen(curl_str, stdout=PIPE)

while p.poll() != None:
  continue

print p.stdout.read() #Should have our flag.
And we get…

Bytes was much of the same. Don’t remember what payload I wrote in the end, but the size of it was allowed to be much larger and I really only needed to do a little bit of tweaking.
Floppy
Our team of corn snakes formed an uneasy alliance with the office mice and slithered into the server room of Evil Robot Corp. They extracted an image of the VPN server before they had to retreat. Turns out sending a team of reptiles into a room whose main purpose is to keep its contents cold wasn’t the best idea.
Can you figure out how this bootable floppy works and recover the secret data?
Floppy’s challenge prompt gives you a floppy disk image identified by file as a
DOS/MBR boot sector. I tried for quite some time to get some successful static
analysis going in radare2, but analyzing it as a static file was definitely not
that great. A lot of the functionality in radare2 actually seemed as confused
as I was, so I began looking for a way to virtualize and debug it.
First up was virtualbox, which nicely showed me what kind of challenge I was to try to crack.
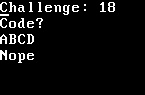
From this I was able to see that there’s a challenge number given (maybe the seconds on the system clock?) with an expected 4 characters of alphanumeric input to compare against. On failure, we’d get a “Nope”, and on success we’d hopefully get a flag.
I wasn’t up for doing much more with Virtualbox though, since I couldn’t find a straightforward way to dump the VM’s RAM that seemed sensible to do within a small amount of time. I also still wanted to debug it, and so no way to do that with VirtualBox.
Eventually I found this blog post, which recommended the bochs emulator. A quick skim through the documentation told me it had all that I was looking for, and so I downloaded it, tar xvfz’d it, and built it. I hit some roadblocks with its GDB-stub when trying to attach to it with both GDB and r2, so I eventually settled for using bochs internal command line debugger.
./configure --enable-disasm --enable-x86-64 --enable-es1370 --enable-debugger
make
BXSHARE=$(pwd)/bios/ bochs #BXSHARE acts as a base directory for configs and ROMS
After doing some config file editing to point bochs at my floppy.img and also enabling floppy-disk drives, I was successfully booting and debugging the floppy disk image. Even better, from within the internal debugger I dug up how to dump all of the RAM as it existed during execution to a local file that radare2 was then able to make much better sense of.
Onto the actual reverse engineering…
I focused first on finding where relevant data lied and what code hit it.
Everything relevant to my investigation was loaded at an 0xe00 offset from
where they were in my static file. By setting a watchpoint on some data
I knew would be written out onto the screen I began to identify critical functions
to start working backwards from.
In my dump, the function at 0x1e00 converted
characters (like ‘1’ and ‘A’) into their representative half-bytes (\x01 and \x0a).
This exited back into a few other functions I reversed (but also lost my notes
on). By doing this backtracking though, I was led to the critical branch at 0x120b, following the comparison of user against some other data to decide whether we enter
the failure halt or get our flag printed.
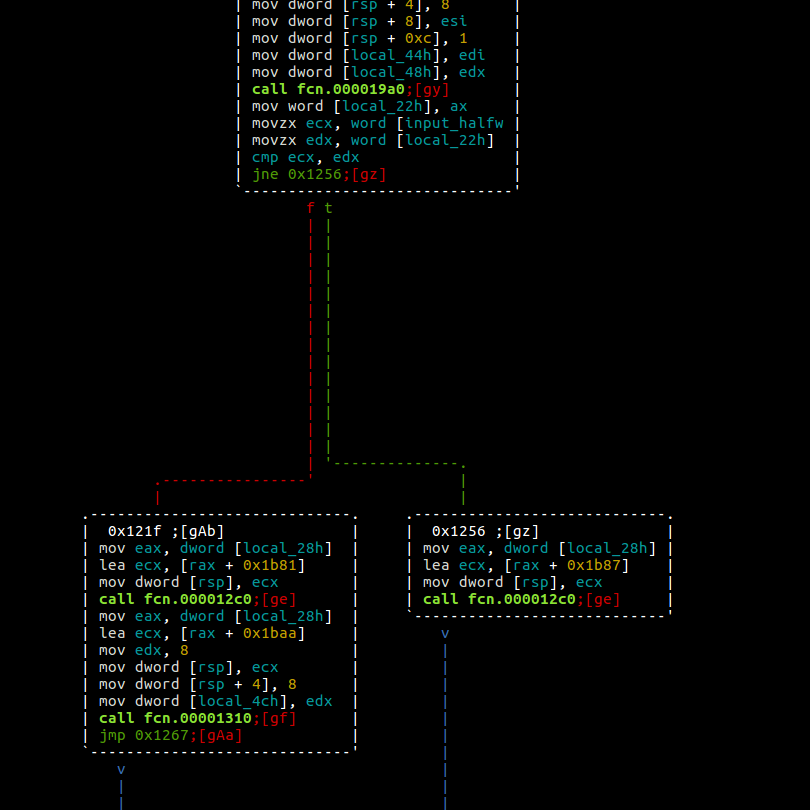
I sadly lost my notes on setup. :( But if you use help inside of the bochs debugger
you should be able to find that these expected codes get generated consistently
per challenge number provided. So it was just a matter of writing down
notes on what numbers were expected by comparing our input data to the data
being compared against as well as the challenge number
until a repeat challenge came.
The Turing Agent
The hamsters have triumphed! We found an open Github repository! It looks like some sort of game; perhaps they’re planning to trick our humans into playing it. We need to know if there’s any data hidden in the game that might harm our humans.
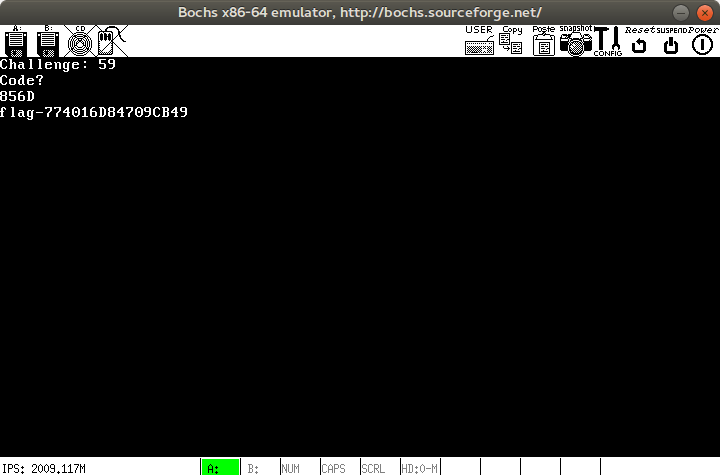
The said Github Repository contains a Gameboy ROM crackme. I never programmed or reverse engineered on the architecture of a Gameboy before, so I spent a long while reading a manual on it, and found the handy mGBA emulator. Thankfully this emulator also comes with a debugger, enabled with the -d flag.


By finding some data that we’re sure the CPU lands on, we can set a watchpoint and wait to see what function we land in. The function at 0x346a in memory seemed to be where the THIS DOOR NEEDS A PASSCODE and NO GOOD messages get accessed. I backtracked from here to find that the function@0x2510 calls it, which is called by subroutine @0x2c00, which then is called by the function at 0x2aff. Quite a lot to follow, yes, but by tracing further back I found that 0x2aa9 held the critical branch that determined whether we branch into success or our usual failure.
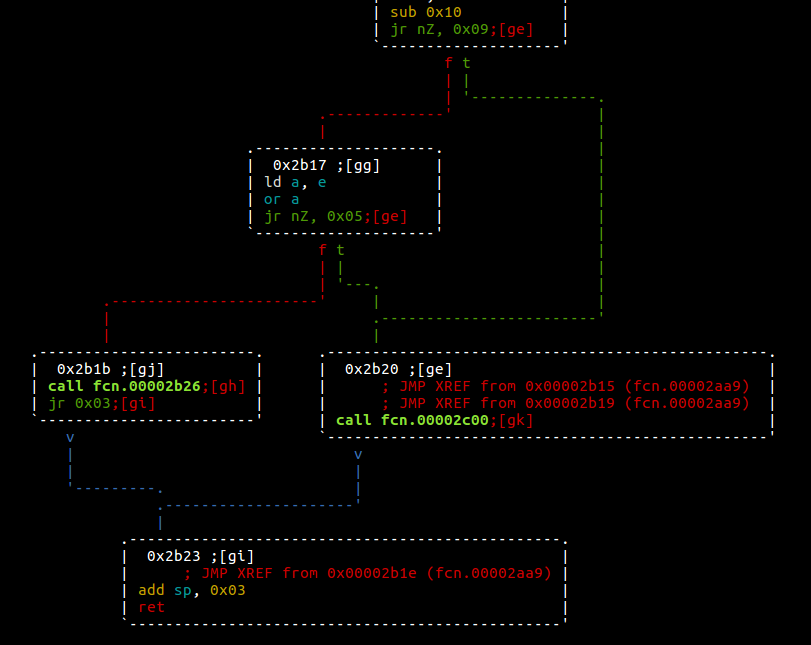
In order to branch into the winning, we need to get the Z flag set to 1, which I sadly learned late couldn’t be done through the debugger alone. So, unless I wanted to dig into some source I had to reverse engineer the algorithm checking our input.
Just about where the checking begins though, I noticed code references to 0x21c.

This here looks to be the secret code, as it would be encoded in button presses. I found through experimentation with the help of the architecture manual that they map to roughly to the following…
[RIGHT] - 01, [LEFT] - 02
[UP] - 04, [DOWN] - 08
[A] - 0x10, [B] - 0x20
So, the sequence turned out to be DOWN, LEFT, A, UP, B, A, UP, DOWN, DOWN, A, UP, RIGHT, LEFT, RIGHT, B, DOWN. This worked! But you’ll have to take my word for it, since the flag rolled by the screen too fast to screenshot. I instead at the time rushed to dump registers and find out it then unencrypted in memory.
Epilogue
The other challenges will follow in another post, since this has already been a ton of writing to do at once.